


You're checking out a patient and scheduling a return visit, but the provider's schedule isn't set up for another year. What do you do? Recall Plans can assist your practice with scheduling return visits and tracking them within NextGen. We will cover what Recall Plans are and how to set them up in Practice Management.
What are Recall Plans?
In NextGen Practice Management, Recall Plans are a mechanism of sending one or more letters to the patient notifying them that they are due to schedule an appointment and tracking whether the patient scheduled that appointment. A common use of a Recall Plan occurs when a patient should return in one year for a specific type of test or visit, however the provider's appointments aren't open for a year from now. Recall Plans should correspond with a specific event type such as 'annual wellness physical' or 'diabetic foot care.' If the practice wishes to notify patients of certain services but does not wish to track whether the patient scheduled, there are other more general ways to communicate with patients such as printing labels to go on general flyers, statement inserts, patient portal, or patient messages.
How to set up Recall Plans
It is typically recommend that your practice choose one to two Recall Plans to start. This is recommended because there are so many scenarios where Recall Plans can be used so it is best to start with a couple and get staff trained and comfortable with using Recall Plans.
To set up Recall Plans, navigate to File Maintenance ⇒ Master Files ⇒ Practice ⇒ Recall Plans.
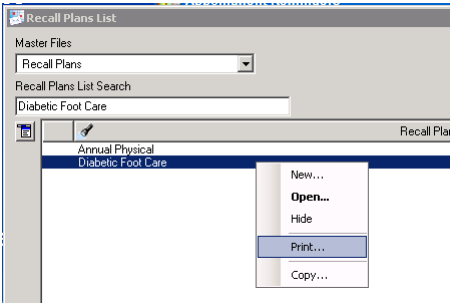
One option once you are inside Recall Plans is to print out the Recall Master Plan file by right clicking in the Recall Plan List. This gives you the opportunity to review the Recall Plans that are already set up and view some of the specific settings such as the plan days and whether or not the resources can be overridden.
Once you create a new Recall Plan or open an existing one, the Recall Plan setup window will appear. The Recall Plan name appears first, followed by when the patient is expected to return (X number of days). The next three fields are Default Event, Default Resource, and Default Location. These fields will match up the plan with an appointment that the patient might make. First you will choose Event Type (physical, diabetic foot care, etc.) and decide if you want to allow override. If the recall is always with a certain provider or at a certain location, you would pick the resource or location that corresponds. If not, you can leave the fields blank and allow override and the user can then choose the resource and location that is appropriate for that patient. If you allow override for any of these, any option would satisfy the recall.
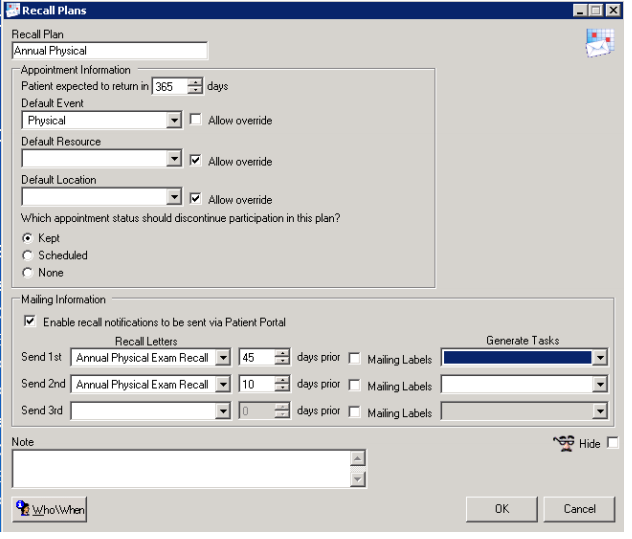
The next step is to choose which appointment status should discontinue participation in the plan: Kept, Scheduled, or None. This option is an important decision because of the implications with how you are going to track your recalls. If, for example, you have an annual physical where there is not much risk involved if the patient comes back, you might want to use the 'Scheduled' option. If you have a high-risk care item for your Recall Plan, you might want to use the 'Kept' option.
The next section of the Recall Plan setup is Mailing Information. This is how you let the patient know that it is time to schedule their appointment. By marking the 'Enable recall notifications to be sent via Patient Portal,' the letter will be sent out to the Patient Portal for those who are enrolled. Not checking this box will mean the patient will not get any notification on Patient Portal. The next portion of this section is where you can indicate which letters are to be sent to the patient in the drop down menu. The 'days prior' drop down indicates how many days prior to the expected return date that letter(s) should be sent. There is also an option to print mailing labels in addition or instead of the letters. This might be used if you have generic letters to send instead of printing a new letter for each Recall. You also have the option to automatically generate the task at the point that the Recall letter is generated.
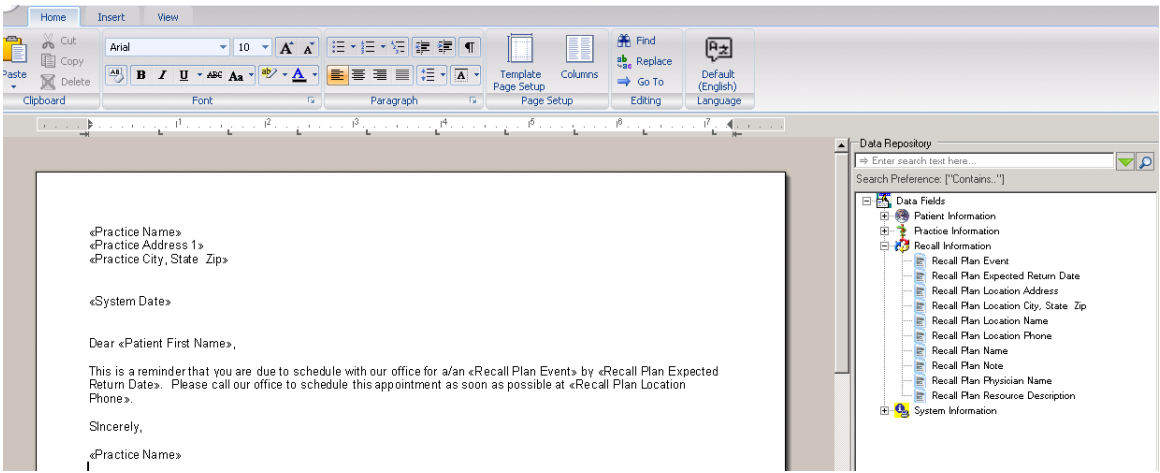
Recall letters are configured in File Maintenance Master Files ⇒ Practice ⇒ PM ⇒ Letters ⇒ Recall Plan. Here you will find an example of a recall letter. This word processing functionality allows you to insert data repository fields.
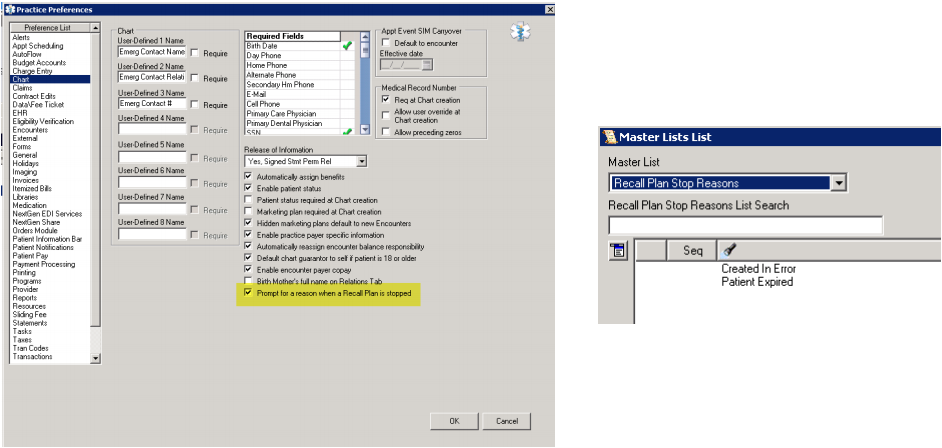
The next recommended step is to set up Recall Plan Stop Reasons. You can find this by going to Practice Preferences ⇒ Chart tab ⇒ Prompt for reason when Recall Plan is stopped. By checking this, when a user stops a recall, they would need to enter a reason for doing so. Reasons are created in File Maintenance ⇒ Master Lists. Some examples of reasons include Created In Error or Patient Expired.
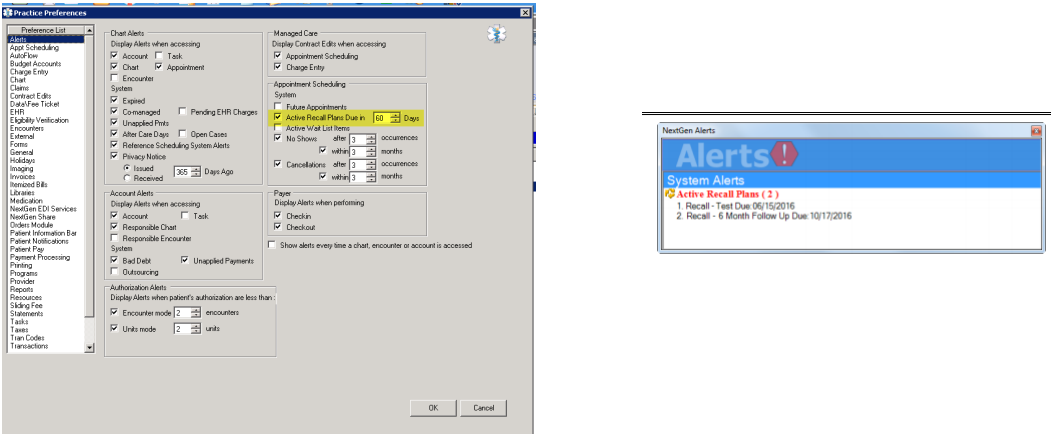
Another option in Practice Preferences is to show an Active Recall Plans Alert, located on the Alerts tab. This will provide a list of Active Recall Plans due in X number of days. This will tie into the expected return date of the patient that you entered when creating the plan.
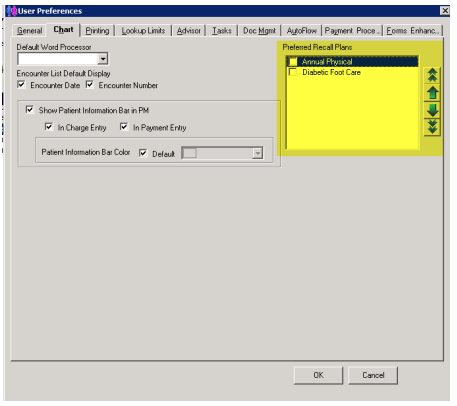
There is an option in User Preferences to Set Preferred Recall Plans. This is on a user-specific basis and allows you to edit the order in which the choices appear in the Recall Plan setup window. If enabled, remember to include this in your new user training curriculum and your PM Master Files ⇒ Default User Preferences - General if your practice pushes user preferences to new employees.
While there are many ways to set up and configure Recall Plans, they are a great option to consider utilizing at your practice to ensure that patients are scheduling return visits and coming to their appointments.