

OSIS Three Most Requested Configuration Changes to the Telephone Communication Template
- Updating the Concern tab in the Medical Question Call Type so it is easier to complete, and required fields are removed.
- Updating the Requested Referral tab in the Referral Request Call Type so it is easier to complete, and not reliant on the Provider Master File in File Maintenance.
- Cleaning up the Contact Type and Spoke With lists within the Call Information tabs of all Call Types, so the options are more relevant and less numerous.
With these requests, OSIS has created easy-to-follow steps to make the three changes listed above.
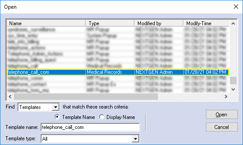
From within NextGen Template Editor, open the telephone_call_comm template.
Right-click on the Communication Component and select Properties from the menu that displays.
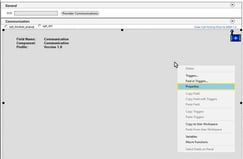
The Hosted Component Field Properties window displays. Click the Settings button.
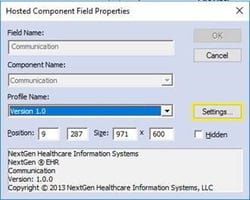
The Settings popup launches.

Configuration One: Updating the Concern Tab in the Medical Question Call Type
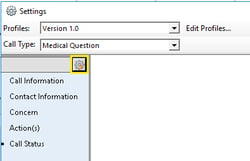
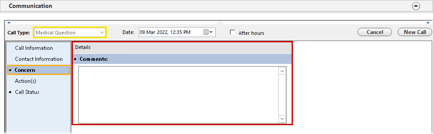
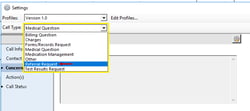
Click within the Call Type dropdown and select Medical Question.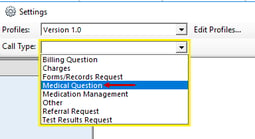
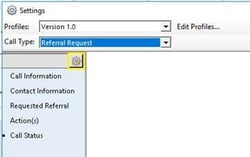
The panel items for the selected Call Type will display click the Gear button to modify the menu.
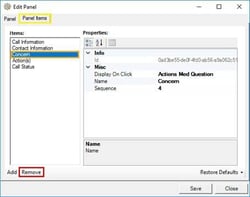
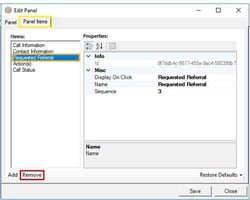
In the Edit Panel window that launches, click on the Panel Items tab, and select Concern from the Items click the Remove button.
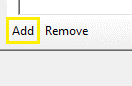
Once the panel item has been removed from the list, click the Add.
In runtime, the user will be given a free-text comments box for medical concern information.
Configuration Two: Updating the Requested Referral tab in the Referral Request Call Type
Click within the Call Type dropdown on the Settings window and select Referral Request.
Once the panel item has been removed, click the Add.

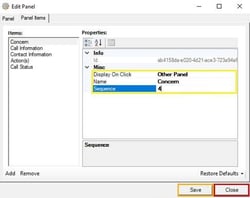
Update the Display On Click, Name, and Sequence fields as shown in the screenshot below, then click the Save Click the Close button.
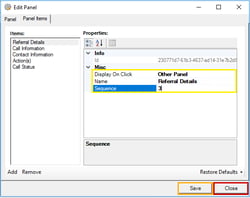
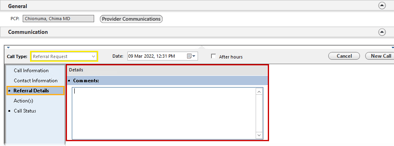
In runtime, the user will be given a free-text comments box for referral request information.
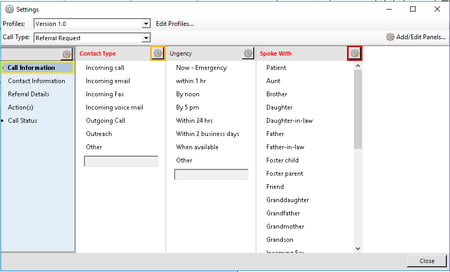
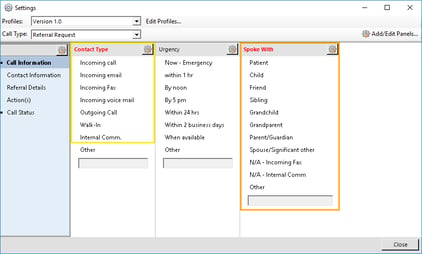
Configuration Three: Cleaning up the Contact Type and Spoke With lists within the Call Information tabs of all Call Types
Select the Call Information Panel Item from the vertical menu on the left, then use the Gear buttons to modify the Contact Type and Spoke With menus.
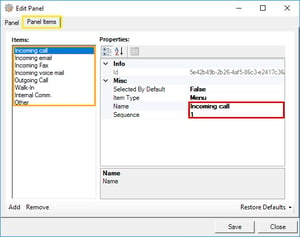
Navigate to the Panel Items tab to select each picklist item from the Items list and modify the Name and Sequence fields.
-
- Note the addition of “Walk-In” and “Internal ” In the Contact Type list.
- Note how gender-specific options in the Spoke With list (“Brother;” “Sister”) have been replaced with a single, gender-neutral option (“Sibling”) to reduce scrolling.
- Lastly, note the addition of “N/A – Incoming Fax” and “N/A – Internal”
- Consider “N/A – Left Message” as another option, if desired.
With these relatively simple improvements, many health centers can increase the ease of use for their existing Telephone Communication workflow. For those health centers that have not yet implemented the newer Telephone Communication template, these changes may be enough to finally help you take the plunge and transition over, increasing functionality and integration for your practice! To learn more about the Telephone Communication template, watch this session in the OSIS Webinar Series: Using the Telephone Communication Template.